After setting up PIN to print, you will need to enter a 4-digit PIN number at the printer itself before your job will print.
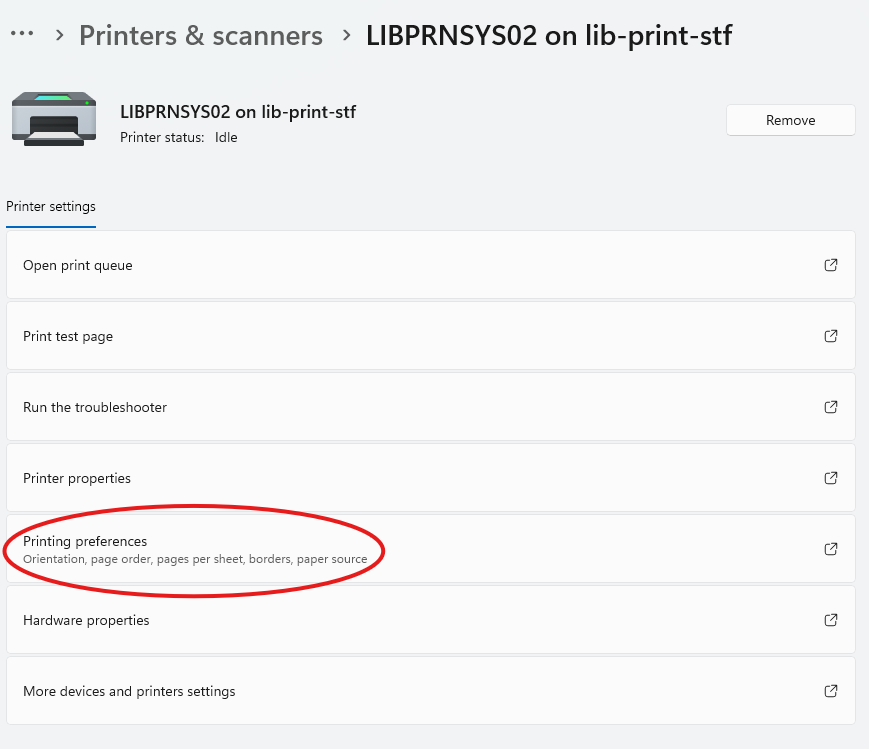
- Open Settings from the Start menu, navigate to Bluetooth & devices, then to Printers & scanners. Click on the printer you want to use PIN to print with.

- Click “Printing preferences.”
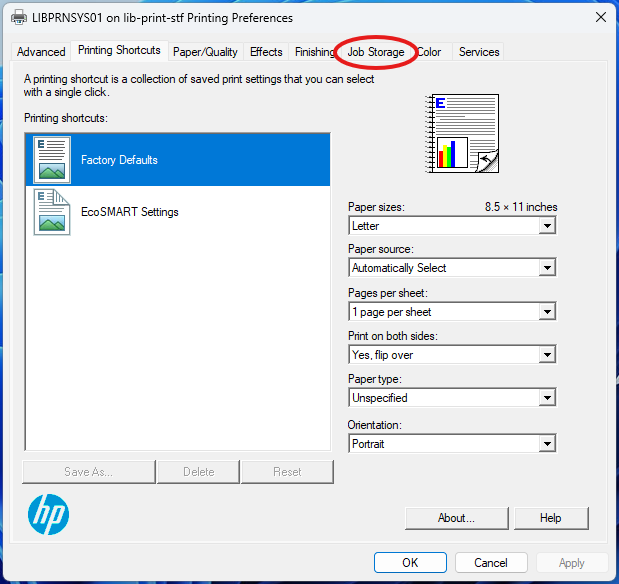
- In Printing Preferences, click the Job Storage tab.
- In the “Job Storage Mode” section, select “Personal Job.” In the pull-down menu under the “Make Job Private/Secure” section, select “PIN to print.” Note: If there is no Job Storage tab, PIN to print is not available on that printer.
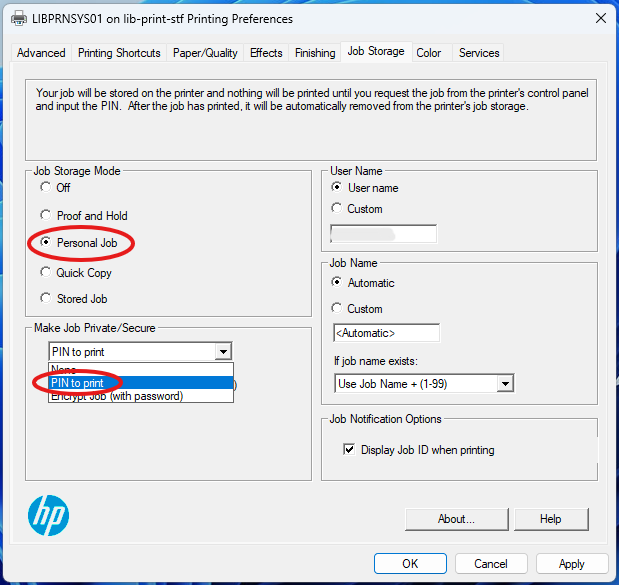
- Enter a 4 digit PIN (it will stay this way until you turn it off or change the pin). Click OK.
![LIBPRNADM08 Printing Preferences. Advanced, printing shortcuts, paper/quality, effects, finishing, job storage: Your job will be stored on the printer and nothing will be printed until you request the job from the printer's control panel. Once the job is printed, it will be automatically removed from the printer's job storage. for private print jobs add a 4-digit personal identification number. Job storage mode: off, proof and hold, personal job, quick copy, stored job. make job private/ secure: none, PIN to print [select PIN, 0000-9999]. User name: user name, custom, EMOSHER. job name: automatic, custom <automatic>. If job name exists: use job name + (1-99). Job notification options: display job ID when printing. About... help. Ok, cancel, apply.](/staff/wp-content/uploads/sites/24/2017/07/PIN-to-print-PIN.png)
At the printer follow one of the methods below to release your job to print (depending on printer model):
- Go to Retrieve from Device Memory. Look for your username on the left and click on the job to print. Then put in your pin in the box (on the right). Next click on the Green “Retrieve from Device Memory” button on the very top of the screen to start the printing.
- Go to Saved Jobs, select your job and type in you PIN.
Note: Once your job is printed it is automatically deleted from the printer.